
Inserting Media in D2L Brightspace’s HTML Editor
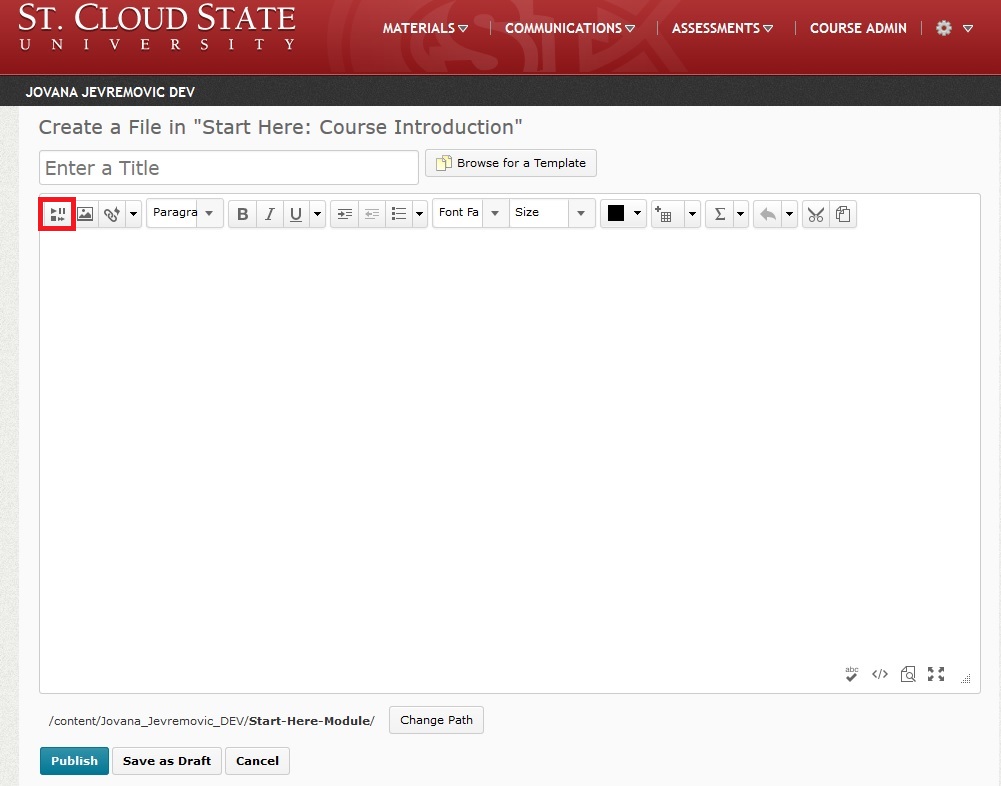
There are plenty of options when you work in your course to create a file and edit it in the HTML editor. When you go to a specific content module you have created in your course, for example Week 1 (under Materials > Content > “Week 1”) you get the Upload /Create button. By clicking on it you get several options, where the second option is commonly used to upload your syllabi or any other file, and then the third option is Create a File. Once you click on Create a file you get a window, as shown below, that is the HTML editor with myriads of editing options that make it easy to work in right from D2l Brightspace. The first tool, called “Insert Stuff” (marked red on the picture below) is how you insert media to your new file. Further below is a list of inserting media options with descriptions.
 Insert a media file from your computer
- Click the
 Insert Stuff icon.
 - Select
 My Computer to browse and select a file from your computer.
 - After you select a file, click Choose Destination to select and create a storage location for the file.
- Click Upload.
- Click Insert.
Insert a media file from your course offering files
- Click the Insert Stuff icon.
- Click
 Course Offering Files to browse and select a file from your computer.
 - Select your file from the file directory and click
 Upload to upload a file to the directory. You can also select a file type from the Media Type drop-down list and click Apply to filter your directory search.
 - After you choose a file, click Next.
- Type a Link Text and an Alternate Text.
- Click Insert.
Insert a media file from Learning Repository
- Click the Insert Stuff icon.
- Click
 Learning Repository to browse available learning object repositories for objects and assets.
 - Select your file from the repository and click Next.
- Enter a Link Text and an Alternate Text. If you text is decorative, you can select the This is decorative checkbox to avoid entering alternative text. Select Start playing automatically if you want your media file to play as soon as the content item opens.
- Click Insert.
Create and insert from My Media
Note: St. Cloud State D2L Brightspace has the My Media integration with Kaltura Mediaspace. Once you click on it, you are able to Add New Webcam Recording or Upload Media from your Mediaspace library.
- Click the Insert Stuff icon.
- Click My Media. Click Add New > Webcam Recording.
- Click Allow if the Flash player prompts you to allow camera and microphone access.
- Click Record and record your video. Click Stop when you finish recording.
- You can click Play to preview your video notes.
- If you want to re-record, click Clear. If you are satisfied with your recording, click Next.
- Enter a Title and an Description of your videos.
- Click Next.
- You can preview the video notes before you insert it.
- Click Insert.
- Click the Insert Stuff icon.
- Click
 YouTube to browse and select a video you want to insert.
 - Click Next. You can preview the YouTube video from the YouTube Properties page.
- Click Insert.
- Click the Insert Stuff icon.
- Click
 Insert Link to insert the URL for an online media file.
 - Enter the URL in the URL field and click Next.
- Click Insert.
Enter Embed Code
- Paste the embed code you have previously copied from your Mediaspace Kaltura.
- Click next then insert.
Films on Demand
- Click on Films on Demand and Search by Keyword
- Once you have found the movie you wanted, click Embed
- Finally, click Insert.