Create a Bitmoji Classroom!

Many teachers struggle to find new ideas for creating a positive classroom culture. They want to have an inclusive classroom that promotes diversity and respect between themselves and their students, but cannot seem to think of concrete ideas to implement this. It can be very difficult to show personality in a classroom (both online or in person) when you narrow a classroom down to curriculum, but there are many ways that educators can make class more fun with visuals or online resources. 


Today we would like to show you one way to help boost your classroom culture by creating a Bitmoji ™ Classroom. First of all, what the heck is a Bitmoji™? Bitmoji™ is an app that you can download onto your smartphone and create fun cartoon (avatar) versions of yourself. 

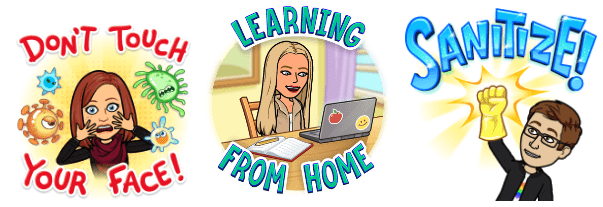
Take a look at our tech team avatars:

Want to learn more? Keep reading!


  1. If you haven’t done so already, download the Bitmoji™ app onto your smartphone or other smart device.
  2. Create your unique avatar.
  3. Start exploring the app to see the fun ways your avatar can be used.


Now that you have created your own avatar, here is a little more in depth explanation:

Bitmoji ™ classrooms are cartoon scenes that you can create using your Bitmoji™ avatar and pictures you find online. These classroom scenes can be used in a variety of ways, including:

  • Morning announcements 
  • Classroom Celebrations & Achievements
  • Adding character to your Slide presentations


Here’s a visual for you:

As you can see from the above example, there are many fun things you can do to create a Bitmoji™ classroom scene. So let’s get started! 


  1. The first thing we like to do when creating these scenes is to open a new Google Slides document (last week’s blog post covers how to do this). There are many ways to make your classroom scenes, but this is our preferred way because it is easy and you may already be using Google Slides anyway.
  2. Next, open a new tab on your web browser. Make sure you are using Google Chrome as your main web browser. Also, make sure you are on Google’s main page.
  3. In the search bar, type Bitmoji™ Chrome Extension.
  4. Follow the instructions to install the extension on your device.
  5. Once installed, you will be prompted to sign in using either your email or Snapchat handle…basically, sign in using whatever information you used when downloading the app onto your smart device earlier.
  6. Once you are signed in, you should see the following icon appear in the upper right corner of your web browser:
  7. Next, click on that icon and a drop down menu will appear. You will see many fun options to have your avatar do different things. 


Now that you have enabled the Bitmoji™ extension, you need to create your classroom scene. This is the fun part!

  1. Open a new tab again and go to Google’s homepage. Search for Free Bitmoji™ Classroom Background Templates. 
  2. Filter your results by clicking on the word Images, that way you can see the pictures of the templates. 
  3. There will be many options, and not all of them will be free. There are some awesome sites dedicated to designing Bitmoji™ classroom backgrounds, and you are welcome to use them for a small fee if you are willing. However, for the purposes of this blog post, we will use a free template. Right click on one of the images you see in your search results.
  4. Select Save Image As… and then follow the prompts to save the image to your computer.
  5. Remember the Google Slideshow we opened earlier? Now is the time to go back to that. 
  6. We recommend setting your main scene picture as the background of your slide. Do this by clicking on Background in the menu bar, Choose Image, then Upload.
  7. Once uploaded, your scene will be set as the background! 


Now you can add your Bitmoji™ avatar to the scene or find other fun pictures or furniture to add to your scene based on how you want the scene to look. 


Reminder: to find your Bitmoji™ avatar, click on the icon in the upper right corner of your screen. You will need to right click and copy the image that you want to put on your Classroom scene.

That’s it! Be creative and have fun with it! Your students will love to see these Bitmoji™ scenes in your classroom!

Google Slides – Tips & Tricks

Google Slides is a favorite teaching tool for many educators, both in person and online. With a huge selection of free features and options, this powerhouse allows teachers to create dynamic, interactive presentations that really engage their students. Whether you’re new to Google Slides or looking to up your game, these resources will help you make the most of it.

Today’s blog post is for anyone who needs some assistance with the technology side of Google Slides, specifically teachers looking to utilize this tool. We will show you some helpful information, like how to add sound to your slides or even how to make them interactive for students.

GOOGLE SLIDES BASICS

Google Slides is similar to the well-known Microsoft program, PowerPoint. The neat thing about Google Slides is that it’s very user-friendly and has many simple features that make it a cinch to create slides for your classroom. So let’s dive in! Here is how to create a new Slideshow:


Step 1: Navigate to www.slides.google.com

Step 2: In the upper left corner of the screen, select Blank. This will open a new Slideshow.

Step 3: Name your Slideshow by clicking in the upper left corner of the screen where it says “Untitled Presentation” and type what you would like the name of your slideshow to be.

Step 4: Explore! There are many features on Google Slides, and the best way to learn the basics is to explore. 


RESIZING YOUR SLIDES

Google Slides offers a highly intuitive interface that makes creating an impressive presentation simple. One example of this is that, when you open a new presentation, Google Slides opens a 16:9 widescreen deck template that fits most laptop screens, tablets, and projectors. But what if you want a different look? What if you wanted to create, for example, an Instagram template?  How can you change slide sizes in Google Slides?


HOW TO: Change the size of your slides

Step 1: Open google slides

Step 2: Click on “file” at the top of your screen

Step 3: Click on “page setup”

Step 4: Choose a preset dimension or choose custom

Step 5: If you choose custom, another box will pop up, you then enter your desired dimensions and unit of measurement. 


ADDING SOUND TO YOUR SLIDES

Here’s a cool feature! Google recently added the ability to include sound files in a Google Slideshow, and this is so exciting! This will make learning so much more fun for students when they can pick up on audio cues and listen to real time sound effects in the slides. There are 2 different types of audio you may want to insert into your slides: narration or music. 


HOW TO: Insert Narration

Step 1: Open Online Voice Recorder

Step 2: Record your narration

Step 3: Open google slides

Step 4: Choose the slide you want to insert the narration on

Step 5: Click on “Insert” at the top of your screen

Step 6: Scroll down and select “audio”

Step 7: Select the recording of your narration

Step 8: Click the “Select” button


You now have a narration!! It’s that easy


HOW TO: Insert Music

Step 1: Open Free Music

Step 2: Select a genre of music

Step 3: Choose a song and download it by pressing the arrow on the right

Step 4: Open google drive

Step 5: Drag and drop your downloaded song into your google drive

Step 6: Open google slides

Step 7: Click on “Insert” at the top of your screen

Step 8: Scroll down and select “audio”

Step 7: Select the downloaded music

Step 8: Click the “Select” button


GOOD TO KNOW

When you have added your sound to your slide show, you will most likely want to share your presentation with others. To do that, you go to the Share button in the upper right corner of Google Slides and get a shareable link. Share the link as you normally would. Here is the big trick with adding sound to a Google Slideshow: The sound file link must also be shared. This is kind of a big deal. If the sound file is not shared, there will be no sound. 


HOW TO: Share the sound file

Step 1: Open Google Drive

Step 2: Select the sound you have inserted into your slides

Step 3: Click on the 3 dots in the upper right corner

Step 4: Click “Share”

Step 5: Where it says “get link” make sure it says that “anyone with the link” can listen

Step 6: Copy that link

Step 7: Click done and share with desired people


INSERT VIDEOS INTO YOUR SLIDES

The nice thing about embedding a video directly in your Google Slides presentation is that you (or your students) don’t have to worry about clicking over to another window or website. Instead, you can simply set the video to play automatically (or once the Play button is clicked). You can use YouTube videos, videos from other sites, or those you’ve created yourself.


HOW TO: Insert video from Google Drive into slideshow

Step 1: Open Google Slides

Step 2: Click “Insert” at the top of your screen

Step 3: Click on “Video”

Step 4: Click on Google Drive and select the video you want to embed

Step 5: Click “Select”


And you’re done!!


Step 1: Open the slide in which the video is on

Step 2: Right click on the video

Step 3: Click on “Video Options”

Step 4: Choose a start time and end time on the sidebar that pops up

What else would you like to learn about Google Slides? There are many features and we love talking about them!

Educators Love EdPuzzle!

One of the main problems in today’s online classrooms is the factor of student participation when it comes to online assignments, homework, or just class in general. Especially during quarantine, the amount of importance that online classing has in our modern curriculum has increased significantly. There arises a problem with this idea, however. 

When teaching a student over a keyboard and screen, a student is at home where they have a lot of control over their own behavior and initiative to participate in classwork. On most homework websites that teachers utilize, however, there are many loopholes that students can utilize to dodge the bulk of most classwork. 

If a teacher or professor posts an online lecture as a video, for example, the student can scroll to the very end of the video to mark that they have finished the assignment, or they can even mute the lecture and exit to another tab to do other online things. 

A lot of the time, this is on the part of the student’s sense of distraction, and they might not even be doing it intentionally. The question still stands though: What can be done to make a student less distracted and how can you force them to participate in assignments when they are at home and in control?

Many options come down to professors using archaic classroom measures that don’t necessarily work in a transition to online classrooms. For example, lecturing a student to pay attention in a zoom class not only alienates the student but it also interrupts the entire class for a longer duration than it might during a normal in-person setting. 

Especially since online classing is stressful enough with all the technical difficulties, it might be better to pursue another option for online classing. It just so happens that, since this is a rising dilemma, many online companies have been trying to create a platform that addresses these topics. One such service goes by the name EdPuzzle, and for today’s blog post, we will talk about the benefits of using it as a service in the field of online education. 

EdPuzzle is an easy-to-use platform where you can make any video your lesson. With just one click, you can find video lessons created by other teachers, including formative assessments! Another click and you can adapt that video by embedding your own questions or audio. With the final click, assign it to your students and get beautiful hassle-free analytics: see who watched the video, who didn’t understand the lesson and who did a good job. Students can re-watch the video as many times as they need at their own pace, while you can easily check their progress from your account. 

With EdPuzzle, you can make any video your lesson in three easy steps:

  1. Find a video on YouTube, upload your own or re-use a video lesson created by another teacher.
  2. Then, edit the video to create your lesson. Record your voice to personalize it, and hold your students accountable by embedding questions in the video.
  3. Assign the video to your students and check their progress in real time while they learn at their own pace.

Below is a great tutorial we found on YouTube by Richard Byrne:

These features and more will help create a cohesive virtual classroom environment and give your students a chance to be engaged and held accountable for their work. While there are admittedly many options available to support your online classes, we feel that this resource is worth your exploration.