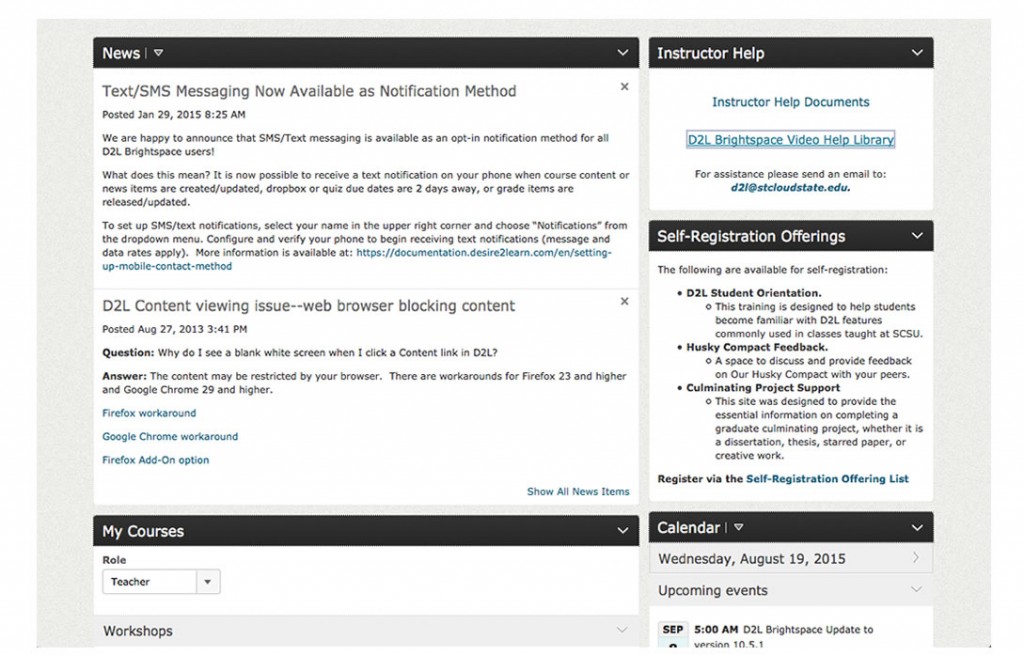
 Mediaspace is a nifty solution for using multimedia in your in class or online courses. It is very easy to put stuff from your media to D2L. You simply log in (here) with your star ID and password.
Many faculty members get frustrated with putting up an audio Power Point in their D2L course. The issues are: students cannot view them while in D2L, they have to download the PPT first. Then, many faculty do not want their PPTs downloaded so they would just upload the PDF version of their PPT to their course. This way, the idea of having a voice over Power Point is lost, and you have to settle with what works best for you.
However, using Screen Recording tool in Mediaspace Kaltura enables you to select the specific area on your screen to record and use the mic along the way. You can record your Power Point and have the audio with it, then just upload it in your D2L course. The cool thing about it – students can view it (and hear the audio) straight from the course and cannot download it.
Bellow are step-by-step instructions of how to do a Webcam Recording or Screen Recording and then embed the video in a Content Module. For additional help and FAQs click here.
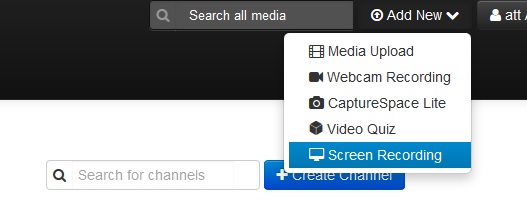
- Once you log in, you will see your name in the upper right corner. Next to it, to the left, you will see Add New, with the drop down menu. You can select Screen Recording or Webcam Recording (as you can see there are 3 more options, but I will cover the basic two now).

- Once you click, you will be prompted to Launch the Screen Recorder or if it is just a video – you will be asked to “Record from Webcam” where you click “Allow Camera and Microphone Access” on the screen.


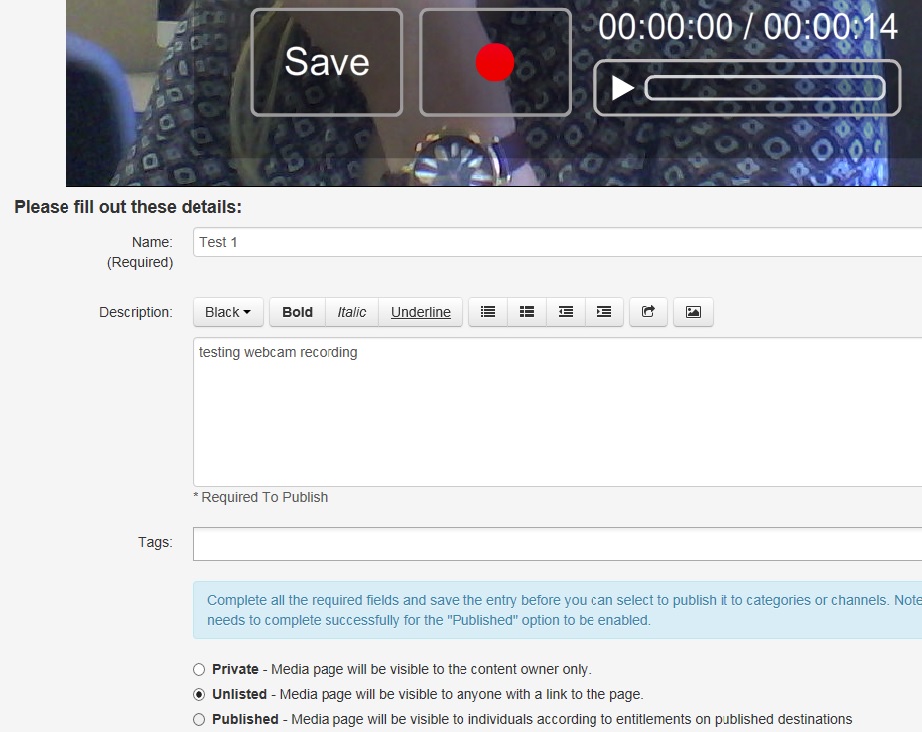
- Next, you start recording. In Screen recording you control the pause button and once you are ready, click done. In Webcam recording, you just click anywhere to start recording and then click anywhere on the screen to stop recording. You will see a box with “Save” appear on the screen.

- It is very important to Save on the screen, as that is how the video is uploaded to your media. Then, Name the video. You can also add a Description for your students.
- The most important thing is to always save it as Unlisted! Why – if it is Private, you will not be able to share it with anyone. If it is Published, anyone can see it right away. Therefore, always click Unlisted and then click on the blue save button below. Once it is saved, you get the option Go to Media.
- You will click Go to Media and it will take you to the newly recorded video/screen capture. From there, you will click Share. You want to be able to get the embed code and share it with your students in your D2L Brightspace course shell. Have your D2L course open in a new tab/new window next to it. Once you click Embed, you will get an embed code in a window and all you need to do is copy it (right click or ctrl-c).

- Now that you have copied the embed code, open your D2L course. In Materials > Content > (any selected) Module > New > Create a File.

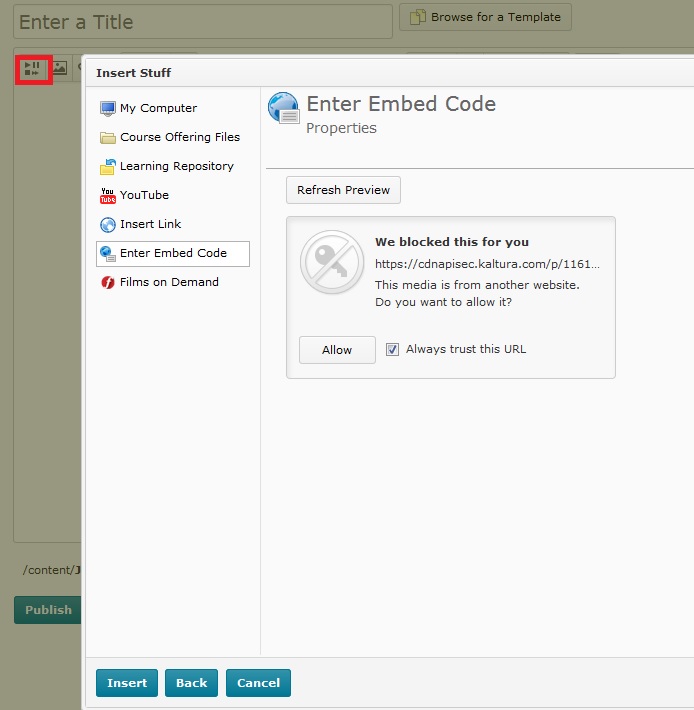
- Once you click Create a File: Enter a Title > (**Below the Title box there are options: The first icon in the upper left corner says Insert Stuff**) > Click Insert Stuff > Enter Embed Code > Paste!!! what you copied in Mediaspace – your embed code > Next > Allow > Insert. Voila, you have inserted the video in your D2L content page. Don’t forget to publish the newly created file.

We hope this post can help you navigate these resources. Again, if you have any trouble getting through the steps, we are here to help! Contact us here, by email att@stcloudstate.edu or just walk in to Miller Center 118.


